|
|
Previous Next
8.17.12 Data Prep ToolLED Wizard has several tools for cleaning up imported artwork, and LED Wizard 8 has put them together in an easy to use interface called the Data Clean Up Tool. Because a high percentage of layouts created in the software come from imported files, and given that these files have a wide range of sources and formats, it is critical that we process these files in a consistent manner so that you get the best results when populating. Therefore the new Data Clean Up Tool will take you through these tools to process all imported files. When you import vector files into a new layout, you'll land right in this tool. But you can also launch this tool from the Tools Menu - Data Prep Tool or use the shortcut key F11. Here is a description of the individual tools that comprise the overall Data Clean Up Tool and the basic workflow of importing and cleaning up artwork. Import CropEnables you to Crop into a file directly in the Import dialog box, to avoid having to import a large file with extraneous data. Remember that the Import Crop tool requires a vector file format, such as AI, EPS, DXF, and PDF. Pure bitmap formats, such as JPG, TIFF, or PNG are not supported through this tool.
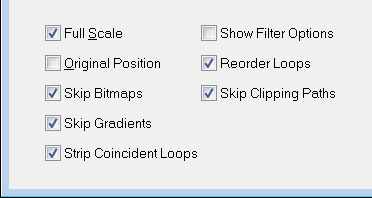
Import FiltersAlso in the Import Dialog box, there are several self explanatory import filters that you can turn on and off with check boxes. If a file is importing slowly and/or is very large, you may considering checking Skip Bitmaps and Skip Gradients. Once you have clicked on the Import button, your file will import directly into the Data clean Up tool interface.
If your artwork is "perfect" and no scaling or data clean up is needed, you can simply click on Done in this tool without running any of the below options. But don't get in the habit of doing this without being sure! A cursory visual check of the data is not sufficient. If you're workflow is to pre-process your artwork in other sign or design program, then you can normally skip these steps, but anything that comes directly from a customer should go through the below steps. Data Prep Tool (includes Scaling)The first task here is to select the vector objects that you want to keep from your imported file. In some cases, this will be the entire file, and in other cases you will select just certain objects. To keep an object, just click on it or draw a box around it. Selecting multiple objects is easy, just draw a box around them. You'll notice as you move the mouse over an object, it will be highlighted with a dotted line, and when you click on it, it turns to a red dottted line. 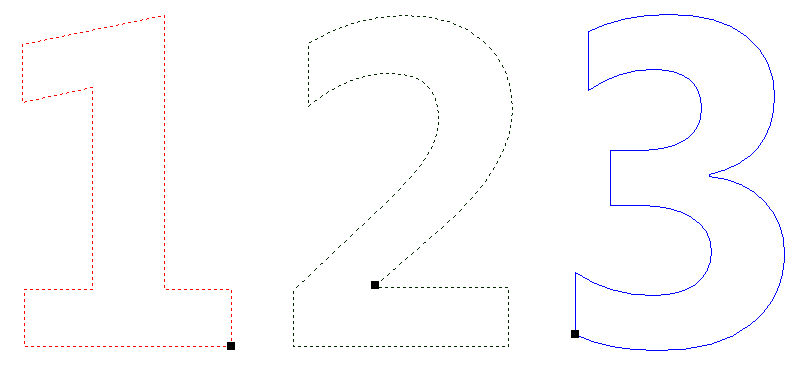
An additional option here that can be very useful is to select objects by color. Let's say you have a line of text in red, but with a gray drop shadow. In order to select all of the red letters at once, press the ALT key as you click on the first letter. All of the other letters with the same color will be selected. If you wish to Deselect an object, click on it again, and the red dotted line will disappear. Or alternatively, hold SHIFT while you draw a box around the object or objects. Part of this extraction process is the option to set a New Width or New Height for the selected objects. If you do not enter a value for either field, then the file will not be scaled. Do not enter both values; this tool will not change the aspect ratio of the artwork. New WidthEnter a number here to specify the real width of the entire selection of objects, or what length the ruler maps to. New HeightEnter a number here to specify the real height of the entire selection of objects, or what length the ruler maps to. RulerThe ruler is a handy feature of the Data Prep Tool, which allows you to define a simple ruler, where the New Width or New Height will be used with the ruler's length to calculate an accurate scale factor to use when scaling the extracted graphics. Initially the ruler is vertical, sized to the height of the entire set of graphics imported. You can grab the top or bottom to resize the ruler, and it will automatically snap to the top or bottom of the graphics imported. If you don't want to snap to graphics, hold down Control when dragging and it won't snap to any graphics. Note: To switch between vertical and horizontal, click in the workspace (or drag the ruler at least once) and press Space. 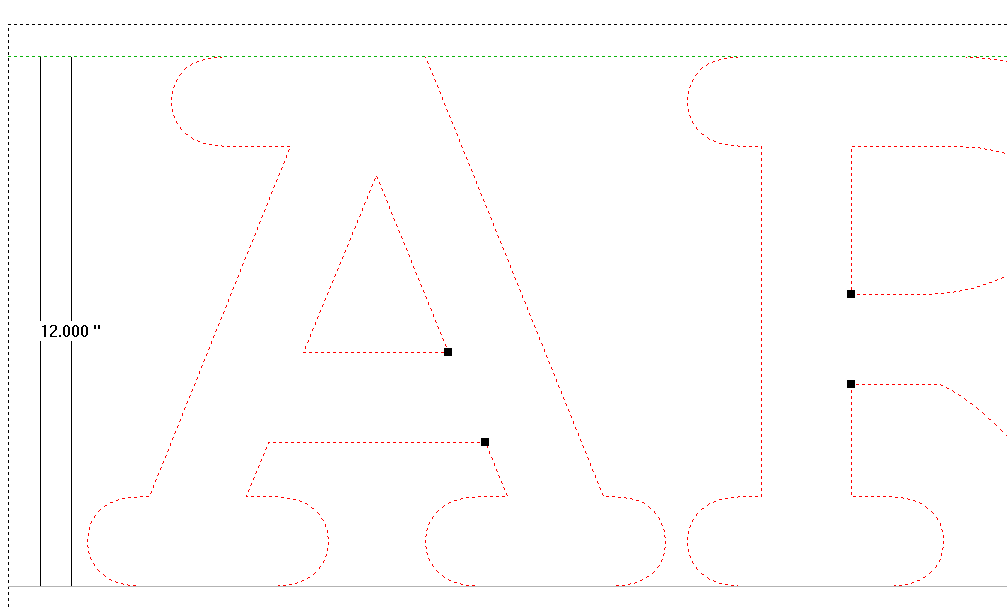
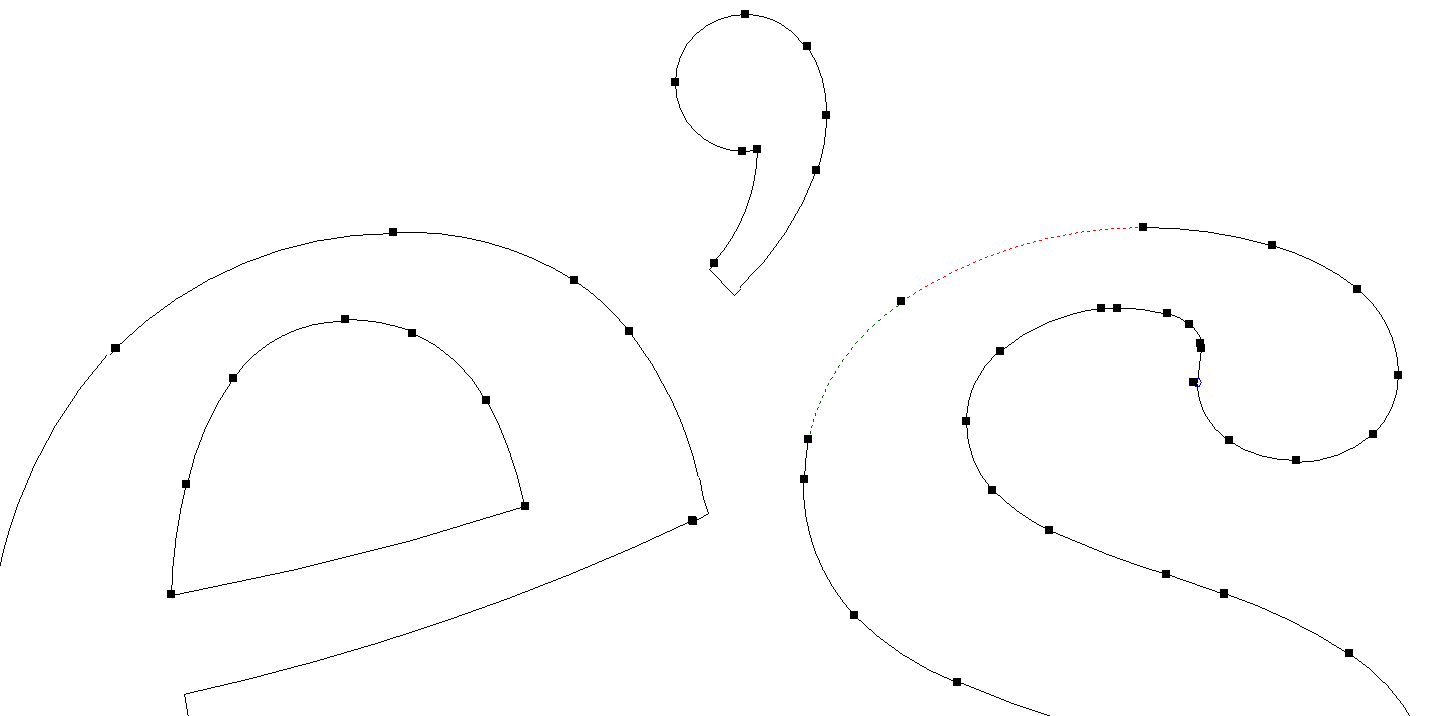
Show Loop StartsSelect this to show a small black dot where the loops start. Vector HandlesSelect this to show the individual vector nodes in the second step of the tool. This is helpful to determining which, if any, additional data clean-up is necessary. UnexplodeThe next option in the Data Clean Up tool is to "unexplode" the data, if necessary. "Exploded" data is data that normally comes from a DXF file and has individual arcs and lines that are not connected. The "Unexplode" option connects these vectors together so that the data can be used for LED population. It can be difficult to know if you have exploded data, because the start and end points of each vector are coincident. But in LED Wizard, when you are working in wireframe mode (Show Colors is turned off), a loop will have one of three colors: blue for a closed outside loop, red for a closed inside loop, and black for an open loop. Exploded data will show up as black, since all loops are open. You can also see from the example that there are multiple Loop Starts, as shown by the small black boxes on the artwork. Clicking on a vector in an attempt to select the whole object only selects a single vector. Therefore in order to select the whole object, you must draw a box around it.
In the property bar, to use the Unexplode tool, check the box and also select Auto or an "Unexplode Tolerance" from the drop down list. This value refers to the distance that the software will look for another vector to connect. In some cases, the points will be right on top of each other, but in other cases, the points may be a small distance apart. Note that if you are Scaling the artwork, then it will be scaled prior to running the Unexplode feature. If you aren't sure what value to use, then Auto is the safest bet. Extract & ScaleOnce you have selected the objects you want to keep, have entered a New Width or New Height, and checked Unexplode if required, you are ready to click on the Extract & Scale button. This will scale the selected objects and run the Unexplode routine if selected. But please note you are still in the tool at this point. Extract & Scale is an intermediate step; there is more to do! You can adjust the Width or Height or the Unexplode settings and click on Extract & Scale again. After you click on Extract & Scale, you now see the objects you've selected, and if you have Vector Handles checked, you will see all the vectors and nodes of the artwork. This display option is to help determine the next step, which is to use one of the automated data clean up tools, if necessary. The second line in the property bar contains the options for data clean up. These tools are "global" tools in the sense that they work on the entire artwork in one operation. This is different from vector editing tools, such as those found in the vector editing pop up menu or ALT Smoothing (add link). Recreate with Bezier CurvesThe first tool to consider is Recreate with Bezier Curves, which will convert the artwork to Bezier curves. If the original artwork is in arcs and lines, or especially just lines (chords), then this function will reduce the number of nodes considerably. If the artwork is already in Bezier curves, which is common in files that were designed in Adobe Illustrator or Corel Draw, then the effect may be minimal. 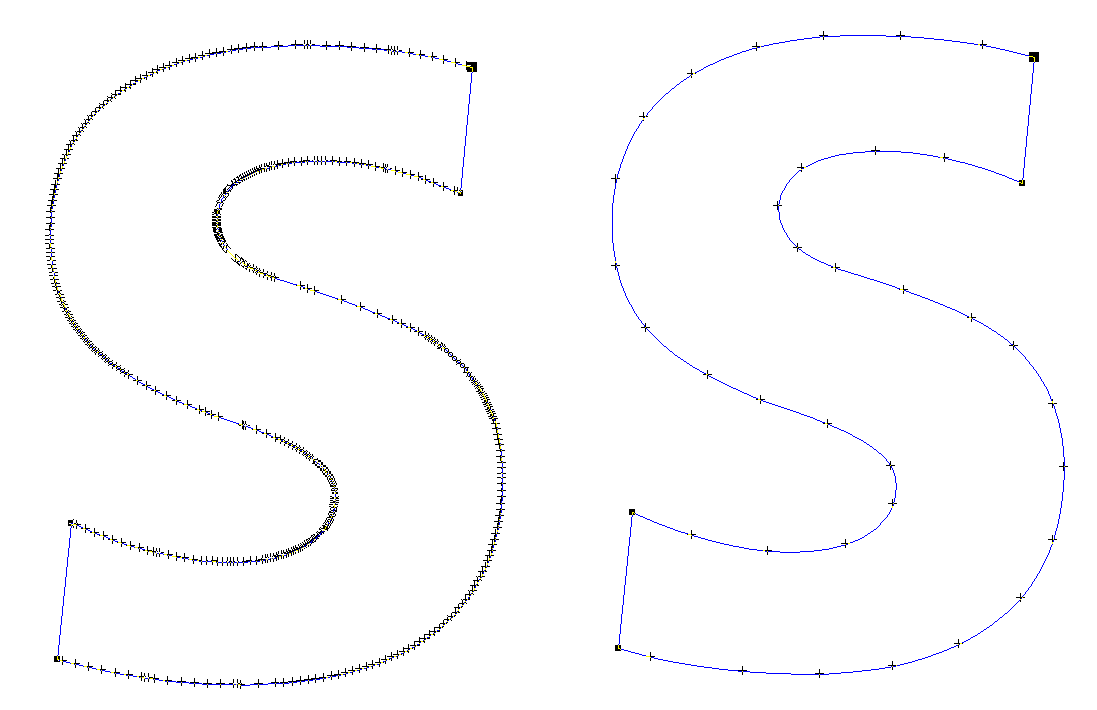
The goal of the function is to increase the quality of the artwork. Recreate with Bezier Curves can be a great tool to smooth out rough artwork and minimize the number of nodes. You can toggle back to the original artwork by clicking on the Reset Cleaning button at the right of the property bar. Rasterize/VectorizeAnother option for data clean up is Rasterize/Vectorize, which will convert the artwork to a bitmap and then (re)vectorize it. There are options for Round Corners and Sharp Corners. In some cases, this can be a dramatic improvement, but it depends on the artwork. Rasterize/Vectorize works well when the vector data is rough, and cleaning up the vector data would be time consuming. Sometimes artwork can look clean, but when you turn of the colors to see the wireframe data, you can see rough edges, overlapping sections, or open loops. 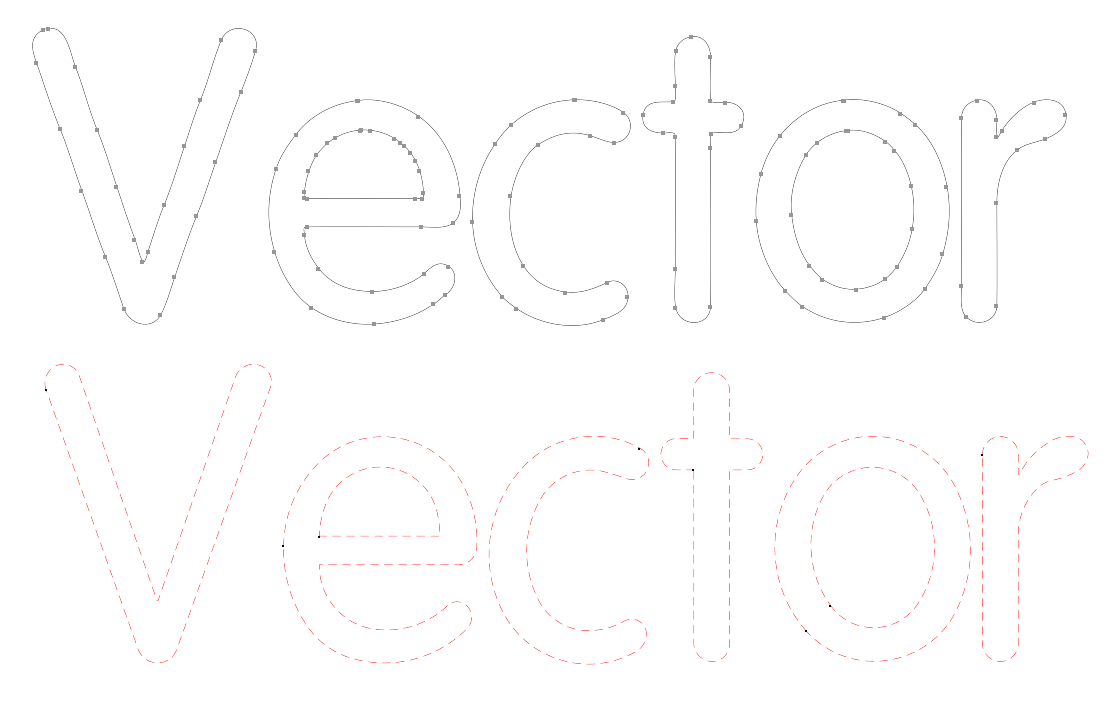
Optimize VectorsThe third and final data clean up option is Optimize Vectors. This will convert the artwork to lines and arcs, while minimizing the number of vectors. Multiple arcs will be converted to a single arc and extra points on a line will be deleted. Optimize Vectors is similar to Recreate with Bezier Curves, but with arcs and lines only. If additional vector editing is needed, and you prefer to work with arcs and lines, then this is the right tool to use. 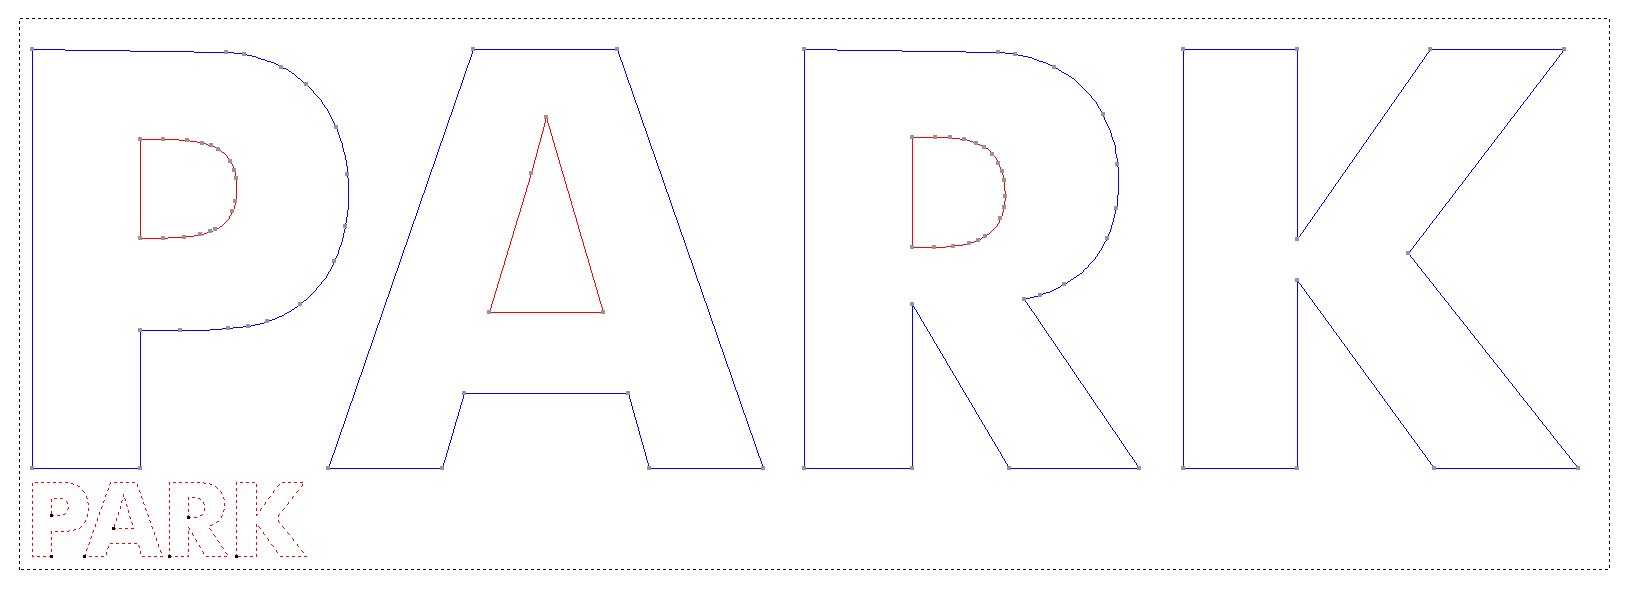
As you become familiar with these tools and how they handle various kinds of artwork, you can test each one before you commit. Just click on one of the options, view the results, and then click on Reset Cleaning to go back to the original. Click on another option to see those results, etc. When you find the one you like best, click on Done. Remember that the original artwork may be fine and these tools might not be necessary. The goal of the tool is to get your data ready for LED population. In some cases, additional vector editing work will need to be done, and those tools are covered in Vector Editing. Assign LettersThis tool includes the Assign Letters feature, where you can select a letter "name box" below the letter, and press that key on the keyboard to set that letter as the name of the object. Please note that you can only assign letters after using any clean up buttons, otherwise your letter assignments will be lost. DoneWhen you're finished, be sure to click on Done. This will bring the final artwork into the main layout window at the proper scale. Previous Next |
Was this helpful?
