
Previous Next
8.11.1 PowerFlow LED Tool 
LED Wizard 8 has a rich set of tools for populating and editing modules to create and fine tune LED layouts.
The majority of these tools are in the Modify Menu, and they are aimed at boosting layout productivity.
PowerFlow enables a new way to edit modules, which is not based on editing the centerline path. The guide paths that are created when you first launch PowerFlow are kind of like magnets for the modules, but it is very easy to deviate from these paths. And when you need to make changes to the position of more than one module, you can now simply make a selection of modules and perform an action on the entire selection. This is where a lot of the increased productivity comes from ? making edits on selections of modules, perhaps even all the modules for an entire letter in one operation.
Along with these new editing tools come many new functions and shortcut keys. At the end of the discussion of these new functions, there will be a cheat sheet with shortcut keys and icons that you can use as a reference.
We are going to divide the discussion of editing modules into three sections: Semi-Automatic Populations, Individual Module Edits, and Selection Module Edits. Many commands will work on both a single module and a selection, but others will only work on one or the other.
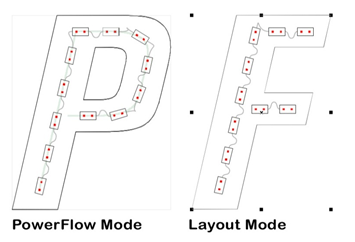
As a quick reminder, PowerFlow is one of the two main operating modes in LED Wizard 8. The Layout Mode is the other. When you are in PowerFlow, you will see the guide path previews and you will not see control points. In the Layout Mode, you will see control points around the selected object or group, but you will not see the guide path previews.
 It is important to know what mode you're in at any given time and what functions are available in each mode. If a certain feature isn't available and you can't figure out why, it may be because you're in the wrong mode. Also remember that you must start with something selected in Layout Mode when you launch PowerFlow.
Previous Next