The Density submenu contains commands and keys for working with the density of modules. The term "density" can mean different things, but for our purposes here, it means:
- A linear measurement of how many modules in a given distance on the wire, such as "Three modules per foot," or "Ten modules per meter."
- A measurement of how many modules for a given area, such as "One module per square foot," or "12 modules per square meter."
LED modules are generally defined by their linear metric. A module may have a maximum linear spacing of two modules per foot, which is 6" from the center of one module to the center of the next module when the wire is pulled tight. But this module may populate at 2.5 or 3 modules per foot, depending on the depth of the sign.
Most of the functions in the Density Menu have to do with the linear density of modules.
But even if we adjust populations based on the linear density, the measurement of how many modules there are in a given area is really a better metric of "module density." A letter set that is populated at "Two modules per square foot" is more descriptive than a letter set that is populated at "Three modules per foot," because that says nothing about the stroke width of the letters.
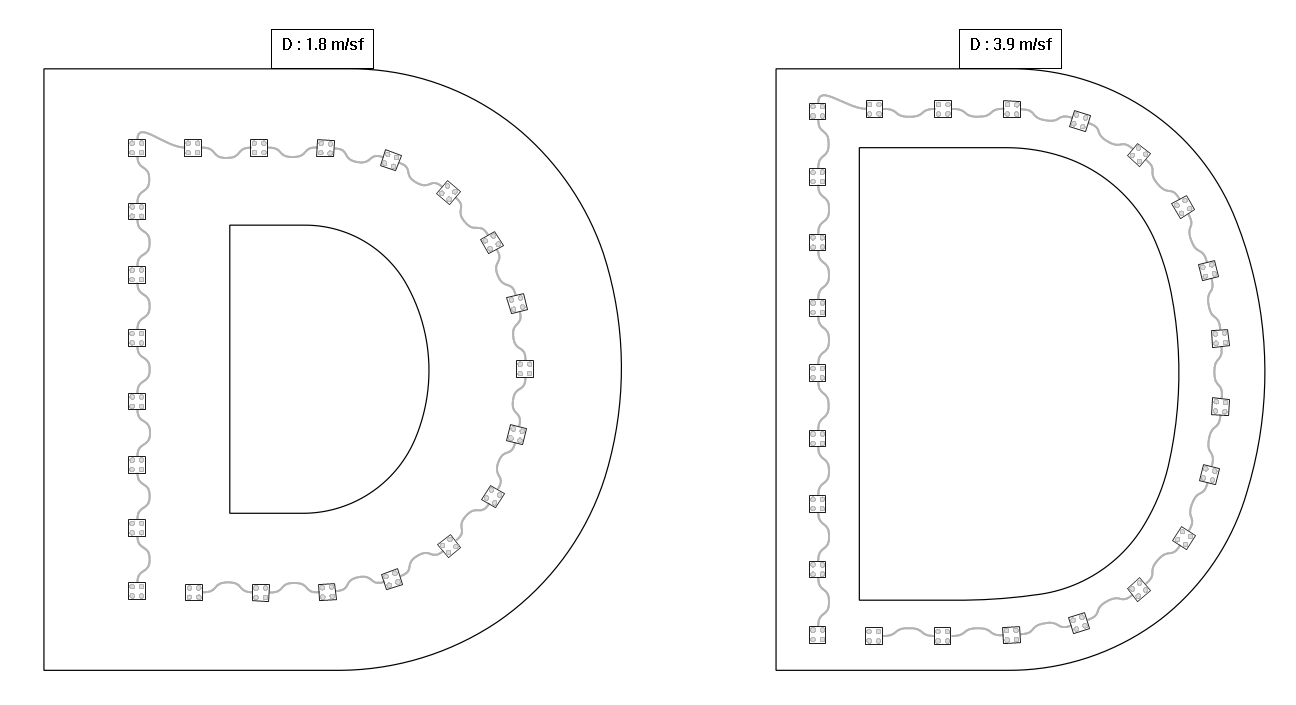
Here we have the letter "D" in Helvetica Bold and Helvetica Regular, same height of 50". The populations about both a little more than two modules per foot, but the first "D" shows 1.8 modules per square foot and the second "D" shows 3.9 modules per square foot.
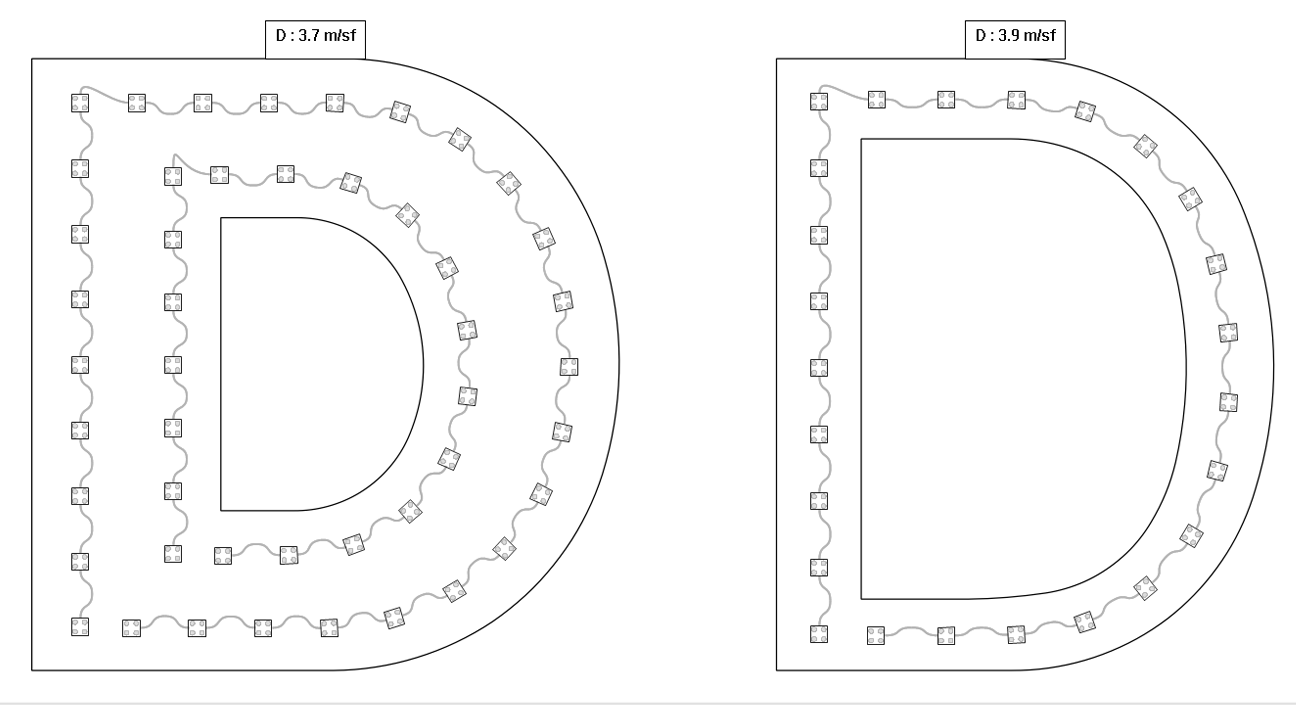
Now when we populate the first "D" with two runs, we get a more consistent 3.7 modules per square foot, as compared to the the second "D" at 3.9.
If you have a set of letters that have a consistent stroke width, then you will get consistent modules per square foot readings when you have consistent modules per foot populations. However, if you have variable stroke widths, then you have to be more careful to maintain consistent brightness across letters, and you should consider looking at the [[Density_Segments]] feature.
Increase Density - W
Adding modules to a selection or run is easy with the Increase Density function.
This will add a single module to the current selection, or the current run when there's no selection. If there are any red wires between modules, this command is an easy way to address that.
Each time you click the icon or use the shortcut key "W," a module will be added (and the selection or run will be respaced).
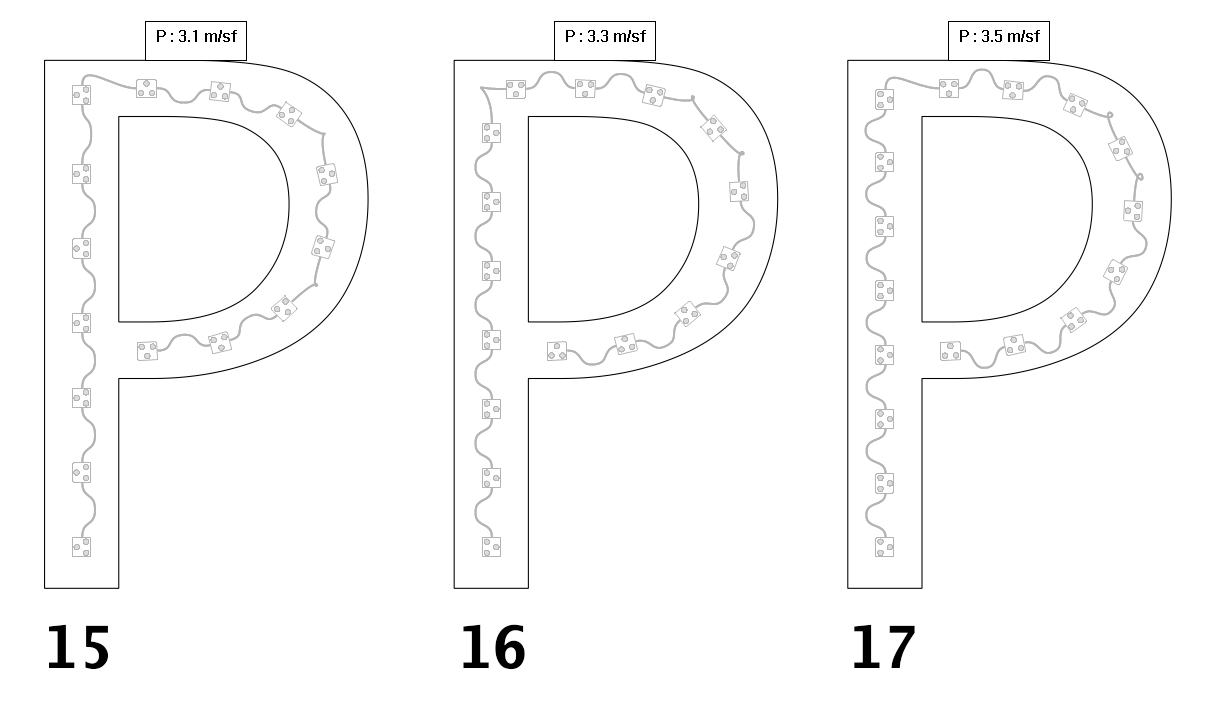
Here we start with 15 modules, then add one and two modules. In this example, we made a selection of all the modules.
Increase Density For Entire Run - Ctrl+W
Pressing Ctrl+W will add a single module to the current run. Use "W" to limit this to the current stroke, meaning the part of the run around the current module that doesn't make sharp turns.
Decrease Density - R
Deleting modules from a selection or run is easy with the Decrease Density function.
This will remove a single module from the current selection, or the current run when there's no selection.
Each time you click the icon or use the shortcut key "R," one module will be deleted (and the selection or run will be respaced).

Be careful that you don't remove so many modules that you end up with red wires, as in the third example here. In some cases, you may want to use the least modules possible in a layout, and one way to do that is to remove modules using this command until you see red wires, and then add one back with the Increase Density command ("W") or Undo.
Decrease Density For Entire Run - Ctrl+R
Pressing Ctrl+R will remove one module from the current run. Use "R" to limit this to the current stroke, meaning the part of the run around the current module that doesn't make sharp turns.
Uniform Spacing - E
Evening out the spacing between modules in a selection or run is easy with the Uniform Spacing function.
This will repace all modules in the current selection, or the current run when there's no selection. As with Increase Density and Decrease Density, the end modules in the run or selection will remain in their current positions, and all modules in between will be adjusted.
Note that when you increase or decrease density using "W" and "R," the modules are automatically respaced evenly. Therefore use this option "E" when you have the correct number of modules and you just want them evenly spaced.
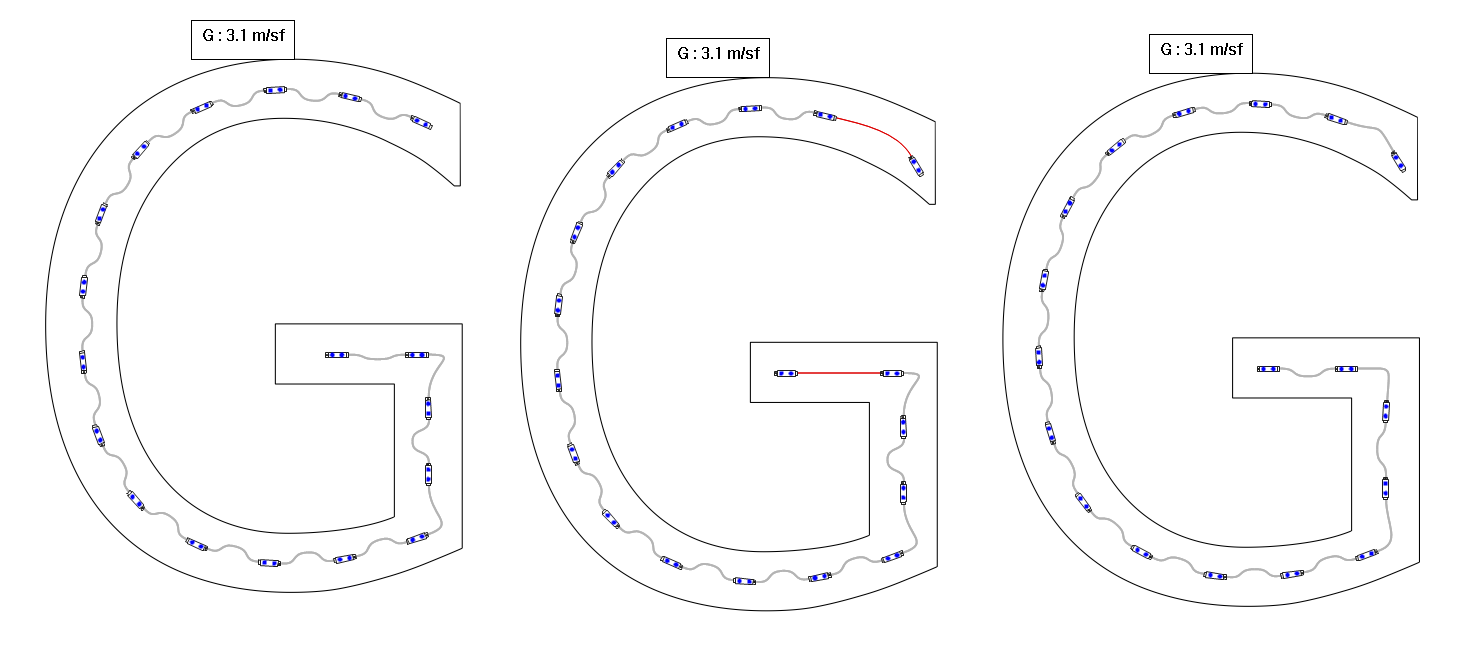
In this example, we want to get the modules deeper into the ends of the strokes. So in the middle graphic, we have moved the end modules, creating red wires. To get to the result in the third graphic, we selected all the modules and then used the shortcut key "E."
Note that you can select all modules by clicking on one end module, then holding SHIFT and clicking on the other end module. Alternatively, you can use SHIFT+A to select all.
Uniform Spacing For Entire Run - Ctrl+E
Pressing Ctrl+E will recalculate the space between the modules of the current run. "E" will be limited to the current run stroke, while Ctrl+E will respace the entire run.
Add / Remove Density Segment - L
The "L" key adds or removes a density segment. This can only be used with the L key and not menu because the cursor position is used.
Show Density Segments - Shift+L
This will show or hide the density segment display. This display is automatically enabled when using L to add or remove a segment.
Clear All Density Segments - Ctrl+Shift+L
Select this or press Ctrl+Shift+L to remove all density segments.