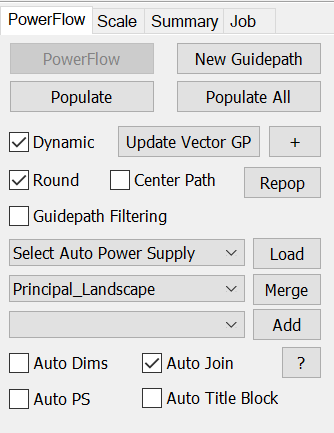
The PowerFlow Tab is the primary interface for automatic populations, editing LED modules, and fine tuning the LED population.
The PowerFlow Tab contains handy buttons for create various type of automatic populations, displays progress and allows you to cancel an auto population.
PowerFlow
This is the button to enter the PowerFlow operating mode on the selected object. Everything in the rest of this section assumes that you are in PowerFlow.
New Guidepath
Clicking this button will regenerate the guidepath used to determine the position of LEDs. If you have the Auto Calc button checked, then this will reference the Density Guidelines to create the new guidepath.
Populate
This button will populate the current object using the current guidepath as shown. When Center Path is not checked, and the letter has thin and thick strokes, you may see sections without a guidepath, but they will be filled in during the Populate operation.
Populate All
This button will populate all letters in the original selected line of text or group of letters.
Dynamic
This checkbox enables the new Dynamic Mode for an LED object. This means that a Vector Guide Path (VGP) is used to create the modules when the object is Scaled graphically with the scale handle, or numerically in the property bar.
Update Vector GP
This will create or update the Vector Guidepath from the path created by the existing LED modules. You would use this function when you changed the module path, and want that change to be reflected in the Vector Guidepath, perhaps for subsequent scaling.
+
The + (plus) button will add the current object's Vector Guidepath to the Population Library. This means that when you use this same font and letter in the future, the same Vector Guidepath will be used, letting you customize the general path of the modules for a particular font and letter combination.
Round
This option rounds sharp corners so that modules are not placed in the corners, but rather more evenly along the path to create a more accurate module count. This option is required if you are going to use the LED Scale features, where corners are always rounded and can appear different from an initial population in which Round Corners was not checked.
Repop
Use this button or the corresponding key, the backtick (~), to repopuate the selected object(s). Using Alt+~ or holding down Alt while pressing this button will recreate the guidepath also. Normally just the modules are populated, but sometimes the guidepath should recreated also, and fix any problems you might see in the module path. You would use this function if you changed the Vector Guidepath using the Vector Edit Tools, and want the modules to track those changes.
Center Path
Check this when you have letter that includes both single row and double row sections of modules, and you want to include, or not include, the center path. Some letters are "iffy" about needing a center path, and this lets you turn off the center path.
Guidepath Filtering
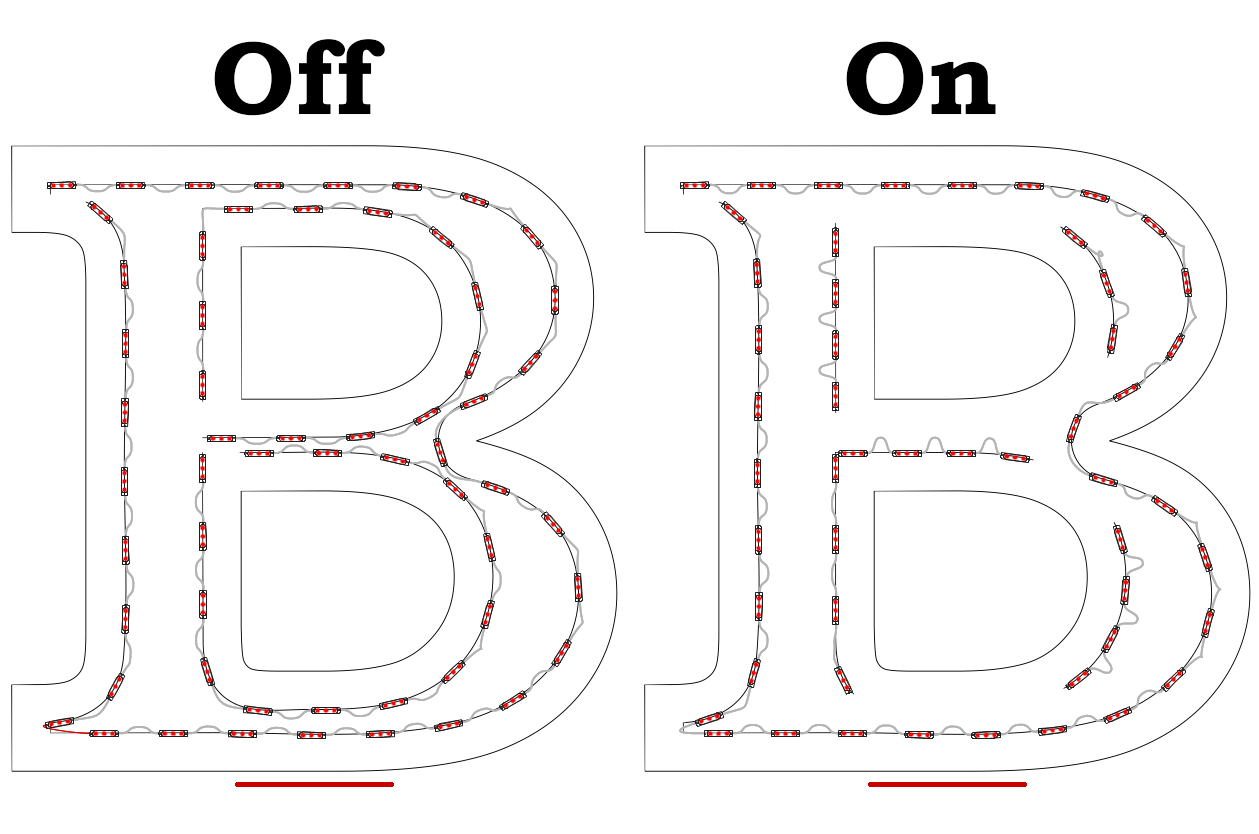
This is a rarely needed option, but when you need it, it's very useful to have. See the example below for a case where it's needed, a font with varying stroke widths. Keep in mind that since not all double run letters would need this type of filtering, we leave it up to you to decide when to use it.

Select Auto Power Supply
Select the power supply loading scheme to use when the Auto PS option is checked, or the Load button is pressed. This loads the current population with the selected power supply, using this loading scheme. These power supply loading methods correspond to the similarly named commands in the PS Menu.
Select Auto Title Block
Select the title block to use when Auto Title Block is selected, or Merge is pressed. This merges the title block with the current LED document.
Load
This loads the current population using the power supply loading scheme selected in the Select Auto PS list, above.
Merge
This merges the current population with the title block selected in the Select Auto Title Block list.
Auto Dims
Check this option to have the graphics have dimensions automatically added.
Auto Join
This enables joining of thin strokes with the inlined runs. If you prefer to do the joining yourself, uncheck this.
Auto PS
Checking this will cause the population to be automatically loaded with the power supply currently selected in the PS Tab.
Auto Title Block
Checking this will cause the title block selected in Select Auto Title Block to be automatically merged with the population when the Populate button is pressed.
Clear
Use the Clear button to remove modules for the current letter.
Clear All
Use the Clear All button to remove modules for all the letters of the original selection, that is, the group or graphic selected when first starting the PowerFlow tool. This removes all modules created with any of the Pop All series of buttons.
Cancel
This button appears when one of the Pop buttons is pressed and lets you cancel the potentially long processing.
 LED Wizard 8 Documentation
 LED Wizard 8 Documentation